Serverless Rest Api With Golang and Aws Api Gateway and Lambda
By: Uncle Cisco On:Sep 13 2020
Post Overview
Using Gin web framework for the routing and HTTP engine
This is a step by step tutorial on how to get you started and deploy your first serverless REST API using golang, AWS lambdas, and AWS API Gateway, all this being powered by Gin-gonic. Serverless computing is gaining a lot of popularity and golang with its speed and simplicity is a perfect companion.
In order to successfully complete this guide, it is assumed you have the following already.
- You have the go language installed in your computer
- AWS account
Entry point of the serverless REST API
Create a new go project, we will call it serverless-golang-api-with-aws. At the root add a main directory with two files localmain.go and lambdamain.go it should look like this:
-
Serverless-golang-api-with-aws
-
Main
-
localmain.go
-
lambdamain.go
-
-
The reason why you need to entry points one local and one for the AWS lambda is because in order to receive the event request from AWS API Gateway you are going to need to add an API proxy. We use gin-gonic for this tutorial but api proxy for AWS Lambda golang also supports Negoni and GorillaMux, unfortunately testing lambdamain.go is not really possible, so you need to have another entry point for local development so you can test it using regular HTTP calls. This is a very simple and direct way to test your lambdas locally.
Let’s create the first endpoint for home and have it return a json response with http status code 200
We are going to be using go.mod for dependencies, if you are cloning the repo you just need to do go build command in the directory where the main file lives for local entry point it would be go build main/localmain.go if you are following along creating your own project from scratch you can install them by executing the go get command for the different dependencies see below:
go get github.com/gin-gonic/gin

go get github.com/aws/aws-lambda-go/events

go get github.com/aws/aws-lambda-go/lambda

go get github.com/awslabs/aws-lambda-go-api-proxy/...
Because developing in lambdas requires two entry points one for your local tests, and one for AWS Lambda, it is a good practice to keep as much code out of these files as possible. Let’s add a router package in the root directory to load the routes in main. Inside the router directory add a routes.go file.
|
|
The golang AWS Lambda Entry Point for serverless APIs
Let’s set up the entry point for AWS lambdas, we are using gin-gonic proxy integration and we will receive the proxy request from AWS API Gateway.
|
|
Use the Init function to start the gin adapter and to load the routes. The func init() is executed before anything else in the package main, therefore we load gin here and the routes, so the request gets routed to the right place. The main function forwards the request to the Handler function which officially starts processing the request.
Golang Local API entry point
You have router with routes “/” and “/ping” but the application has not been tested yet, let’s add the local entry point the routes we added to the router.
|
|
We do not need the init function for the local entry point since we do not need to initialize the gin adapter for lambda, instead the local entry point starts a server.
Open a terminal and cd into the project root directory, and execute the command go run main/localmain.go if you are using an IDE like IntelliJ with the golang plugin you can also just use CTRL+SHIFT+F10 (Windows). In your browser of preference, you should be able to go localhost:8080/ (Windows) and you should see a JSON response in the browser, the screenshot below is from Fire Fox. The localhost:8080/ping endpoint should also be available and return a response.
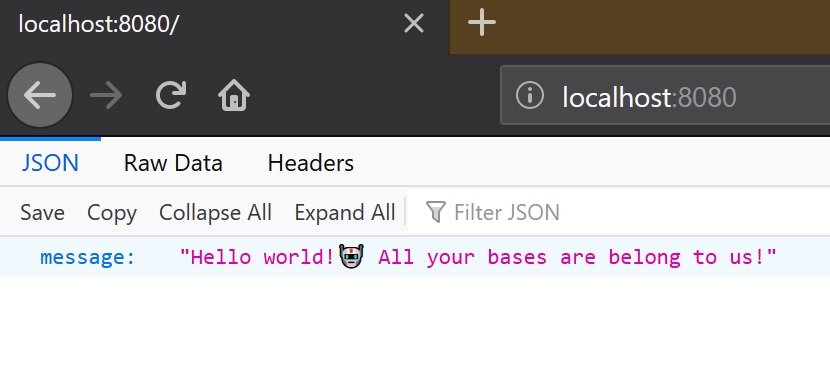
localmain.go response
It is obvious how easy it can be to turn a legacy API into a lambda if you organize your code right and vice versa. Having minimal logic at the entry point is a good set up to go from serverless to conventional and vice versa if business needs change.
This is a good example to get started with golang and AWS lambda for a serverless API, however, we will add a third-party endpoint, just to further demonstrate code organization and make a little closer to real production usage.
Example: NASA - Mars’ Sols Weather API

Let’s go to Mars. There are a lot of open APIs (some intentionally others…. ), I chose a NASA one because I’m a fan of going to space. I went into it not knowing NASA does not put their best people for their public APIs, the JSON response they sent is bad structure, but I wrote some code to make it more uniform, an intern is an intern even at NASA.
The NASA API we will be using has the Mars Sols Weather Data A Sol would be the equivalent of a day on earth (a little bit longer). NASA samples the weather, wind speed, and atmospheric pressure of mars, so we will use these data to calculate the hottest, windiest, and heaviest (for lack of a better word to describe highest atmospheric pressure) with the data we get back from the API. Of course, we will be using the DEMO API we because it doesn’t require an application process. Feel free to apply for the real deal, for this tutorial the sample data sent will suffice.
Let’s create a new package called mars in the root directory and add mars/weatherservice.go we will put the call to the NASA API here. Let’s also create a package called structs where all our structs for serializing and deserializing requests and responses will live. Create a file name mars in the structs package structs/mars.go let’s start creating the structs for mars. You can find the whole file in the Github repository.
NASA API Response
Remember I told you NASA doesn’t put their best for public API development? Well here is why the response has at the root level a map of map[string]Sol followed by other root level properties like sol_keys which is an array of strings. This is bad design because it makes it really hard to deserialize, Mars has 687 sols, because the root level properties are objects with different signatures I cannot just create a good golang struct to receive the Sol map without literally writing each sol as an individual property. I did a trick in Excel in order to do it quickly but it is just a malpractice from the NASA developers, maybe there a way to do it properly I just couldn’t think of it, anyways the full code is in Github. I took the Nasa response and I parse it into FriendlyResponse which looks more like the way I would have design the data structure for the response.
|
|
Making HTTP Request To NASA Mars’ Weather API
The SolWeatherResponse has a method to parse it into the FriendlyResponse nothing fancy, it eliminates sols that do not have data (nils) and it also iterates through them to find the hottest, windiest and heaviest sols in mars as per the response received.
|
|
We will again use the init function to initialize the values passed to the Nasa API call. This includes the API key, version and API URL, we will also add another package to the project to grab the environmental variables for this information, for a production project you will most likely use environmental variables to store this information.
Using AWS Lambdas Environmental variables
Create package appsettings at the root and add file applicationsettings.go this will have some little code to grab the information from the environmental variables, it also provides a fallback for non-sensitive information for convenience. There are small golang packages that can do this too, but I feel a package to grab information from environmental variables is unnecessary overkill, a couple lines of code are all you need.
|
|
NASA Mars Controller
Let’s now add the controller for the service, the controller will take the request and call the appropriate functions in the service, this is just the way I prefer to organize my golang serverless APIs. The controller has very little logic, most of the action happens in the service and in the struct methods. Under the mars package create weathercontroller.go file.
|
|
GetMarsSolsWeatherInfoController will be the function in the controller that will call the right functions in the service. Very simple controller, clean and small, this abstract the complexity of your project as it grows. Organization is the key to make complexity more readable for you in the future and for anyone working with you on this project. Now let’s add the route to call the controller.
Create the file marsroutes.go under the router package. We will add the GET: mars/weather/sols endpoint.
|
|
Let’s add the mars routes to loadRoutes function we created earlier. It should now look like this.
|
|
Directory Final Structure
Okay now your project directory should start looking like this.
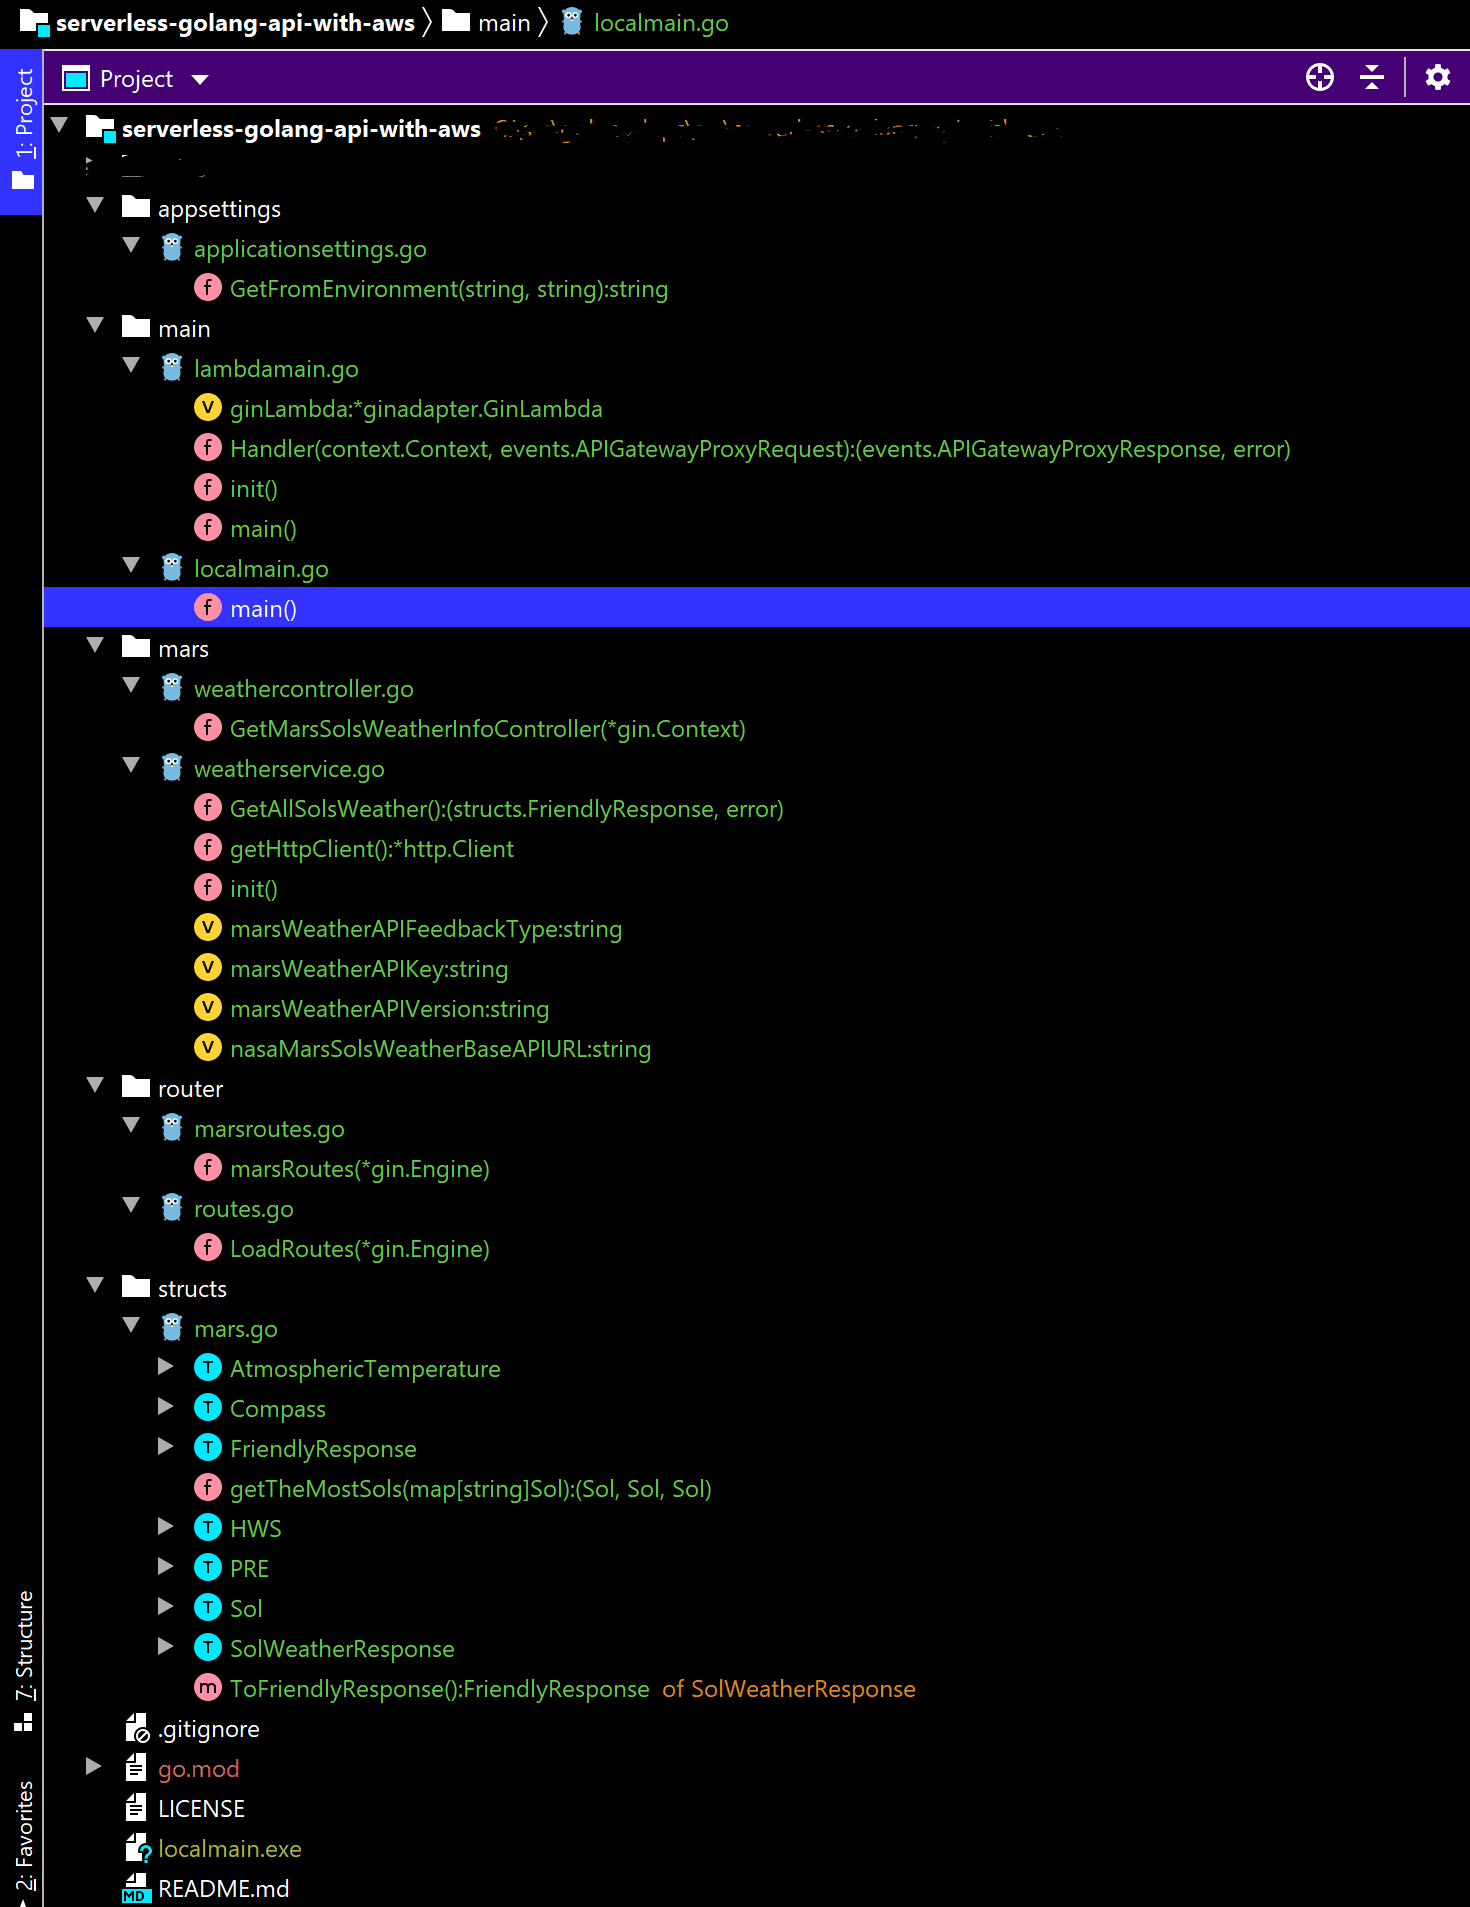
Final Directory
Let’s run the project one more time and test the new route mars/weather/sols since it is a GET we should be able to test it in the browser directly. If you are using FF like me, it will prettify the JSON response and collapse the nested properties. It should look like this.
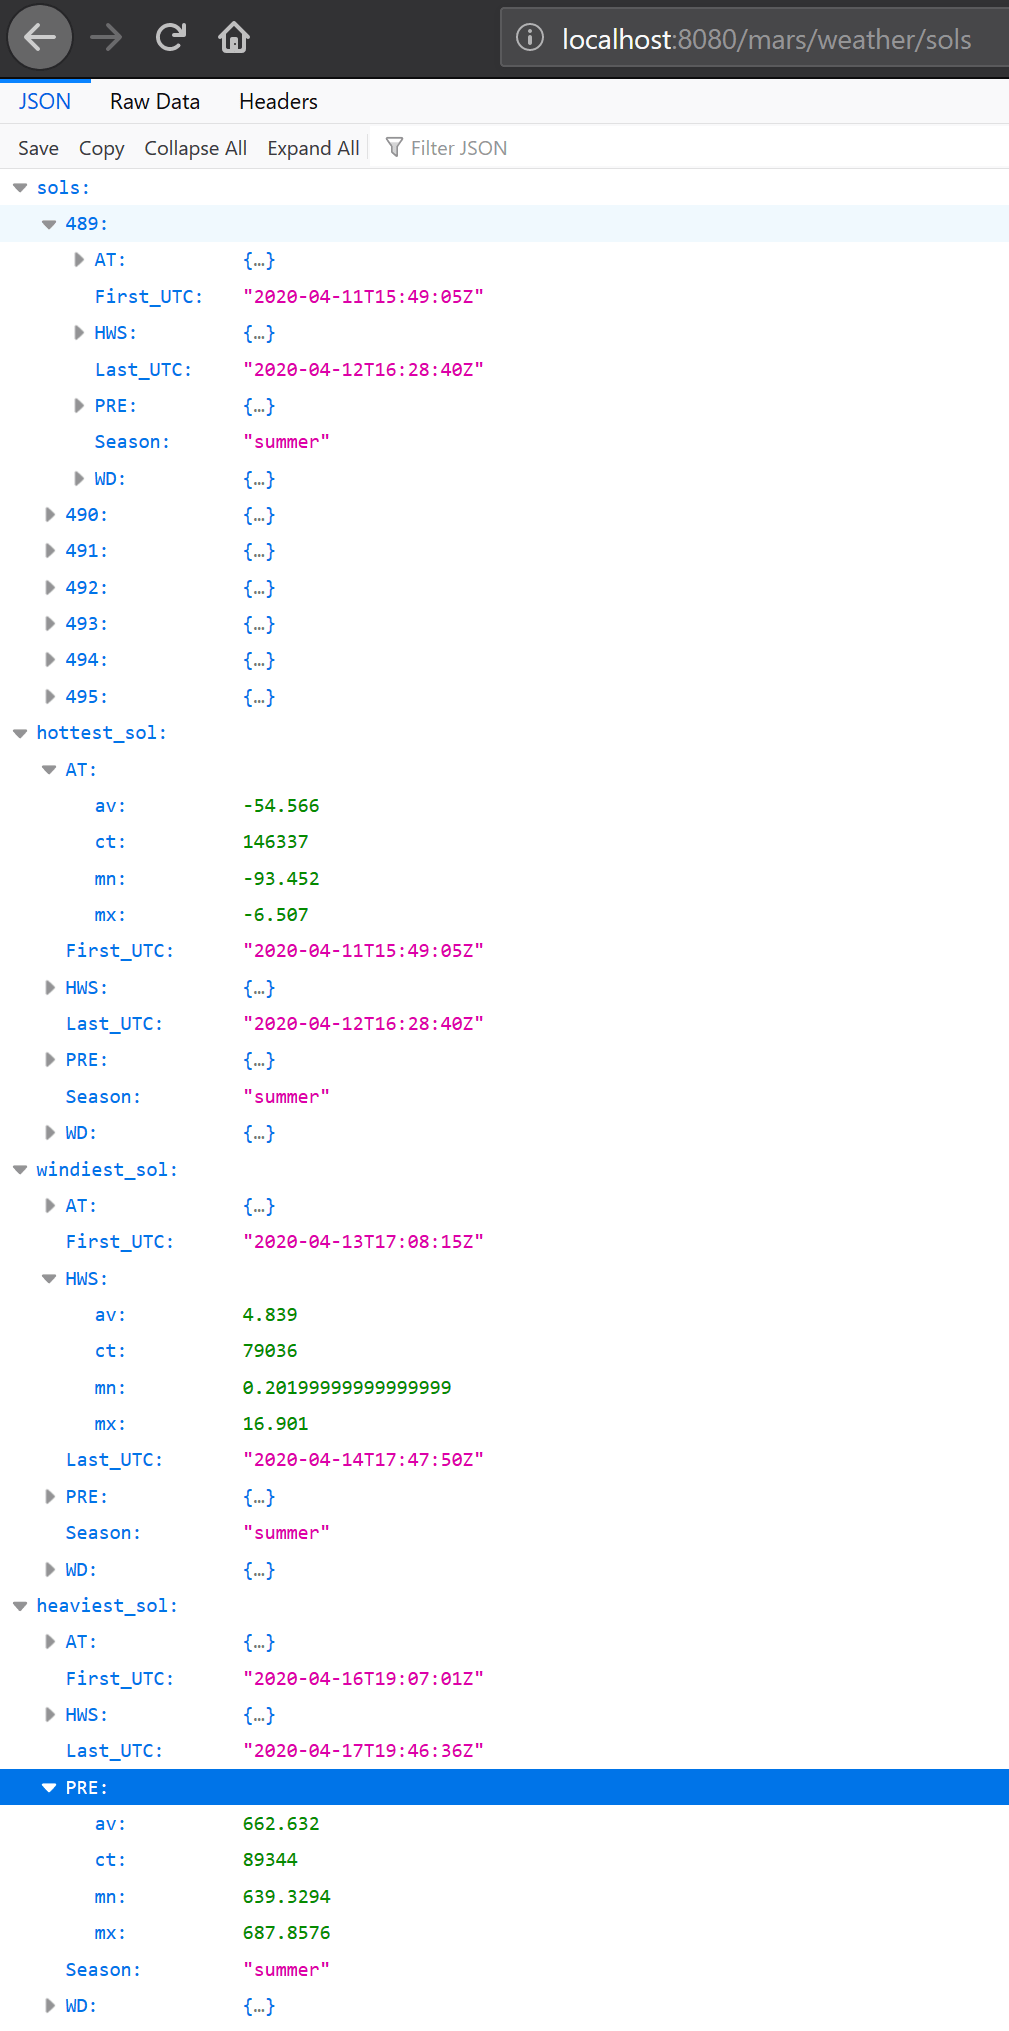
NASA Mars’ Sols Weather API Response JSON
Everything is in place now, we got all we need to ship this demo to the lambda. You will need to make the executable for Linux architecture, you can set this in the go env by using environmental variables for the Operating system and architecture, but I find it easier to just install Ubuntu in Windows using the MS store app here if you install it you will need to set it up and install go in Ubuntu as well. Once you have it set up you can navigate to your project from the Ubuntu instance by accessing the c drive as a mount /mnt/c and of course cd into the project, once there cd into the main directory and build the lambdamain.go file, it will download the dependencies if you don’t have them already and it will create an executable file, you will need to zip it zip main.zip lambdamain and that is all. Like I said I think it is easier to this once than to change your env var in Windows, but you decide what works better for you. Mac OS users and Linux user do not need to worry about it.

Build Lambda Package Console
Create Lambda function in AWS Step By Step
-
Go to AWS website and log in. From the services menu select Lambda
-
Click on the Create button
-
On the selection screen select Create from Scratch
-
Give it a name and select Go 1.xx as the runtime
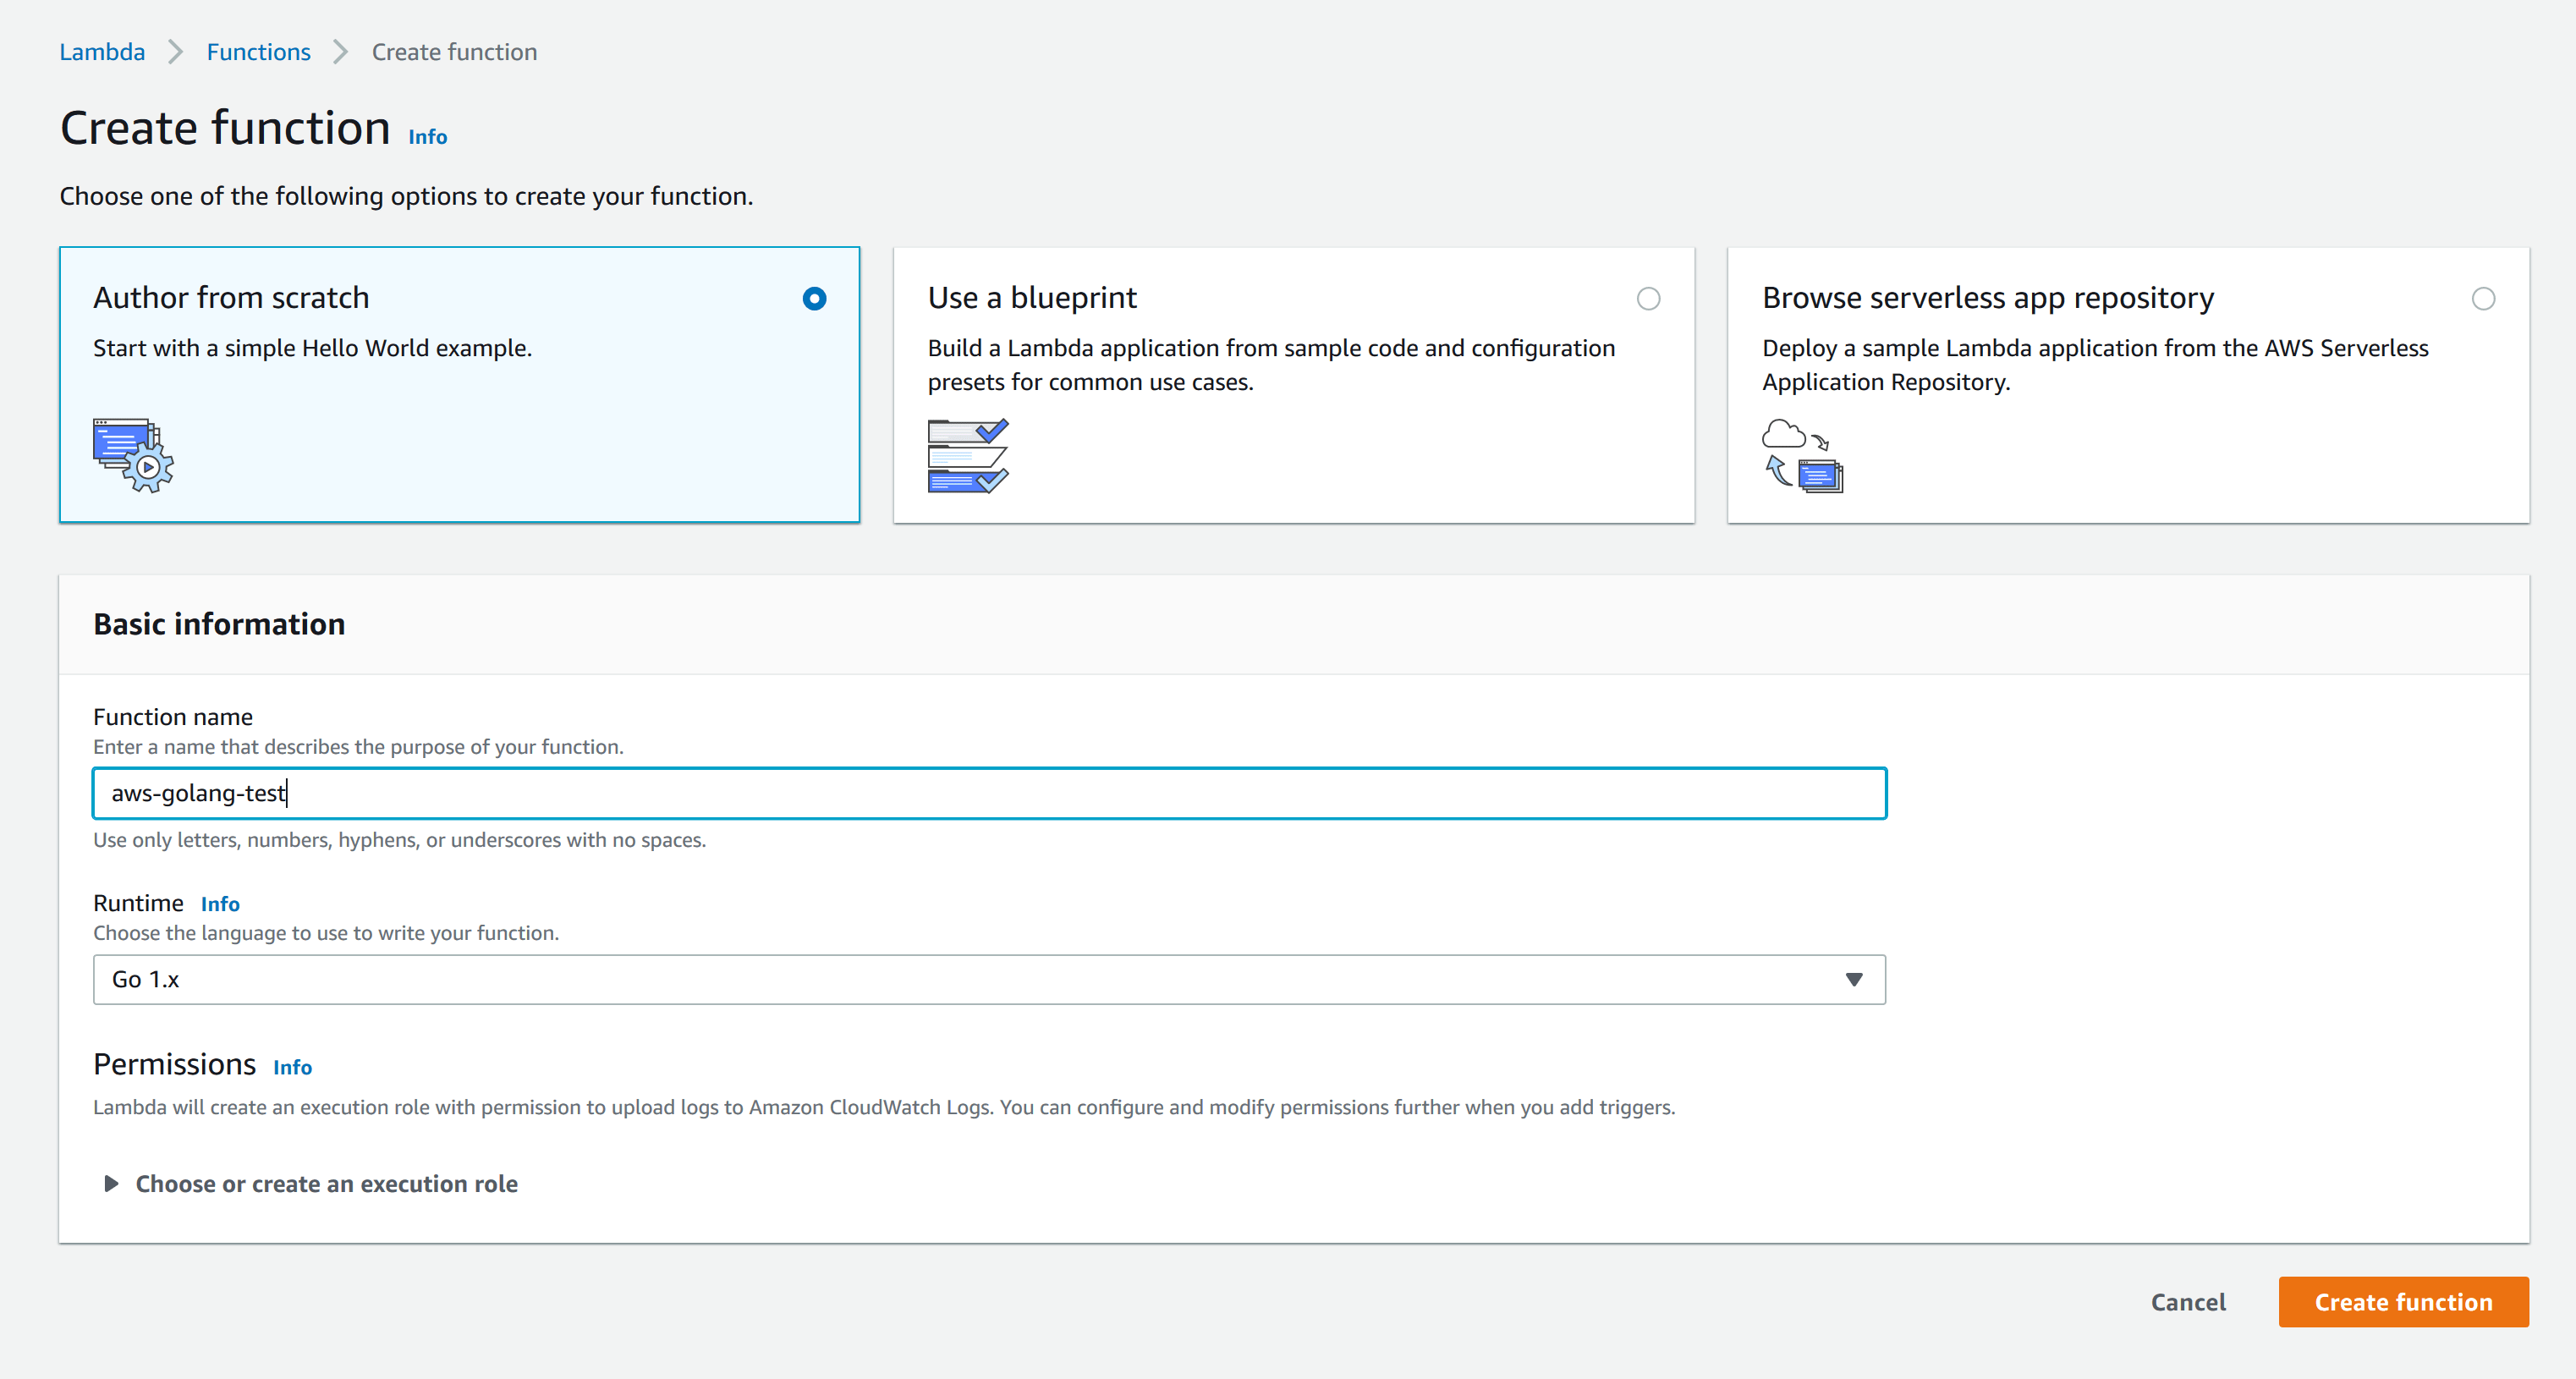
Create a golang lambda
-
Click Create Lambda
-
On the next screen scroll and click the upload button, browse the zip file we created earlier, the handler name is the name of the executable file we created earlier too. For the lambda entry point we named it lambdamain type it in the Handler input box and Save. You should see a success banner at top and the lambda should be successfully added to AWS.
-
Scroll down and stop at the environmental variable sections, click Edit
-
Set the environmental variables for the NASA API and save again.
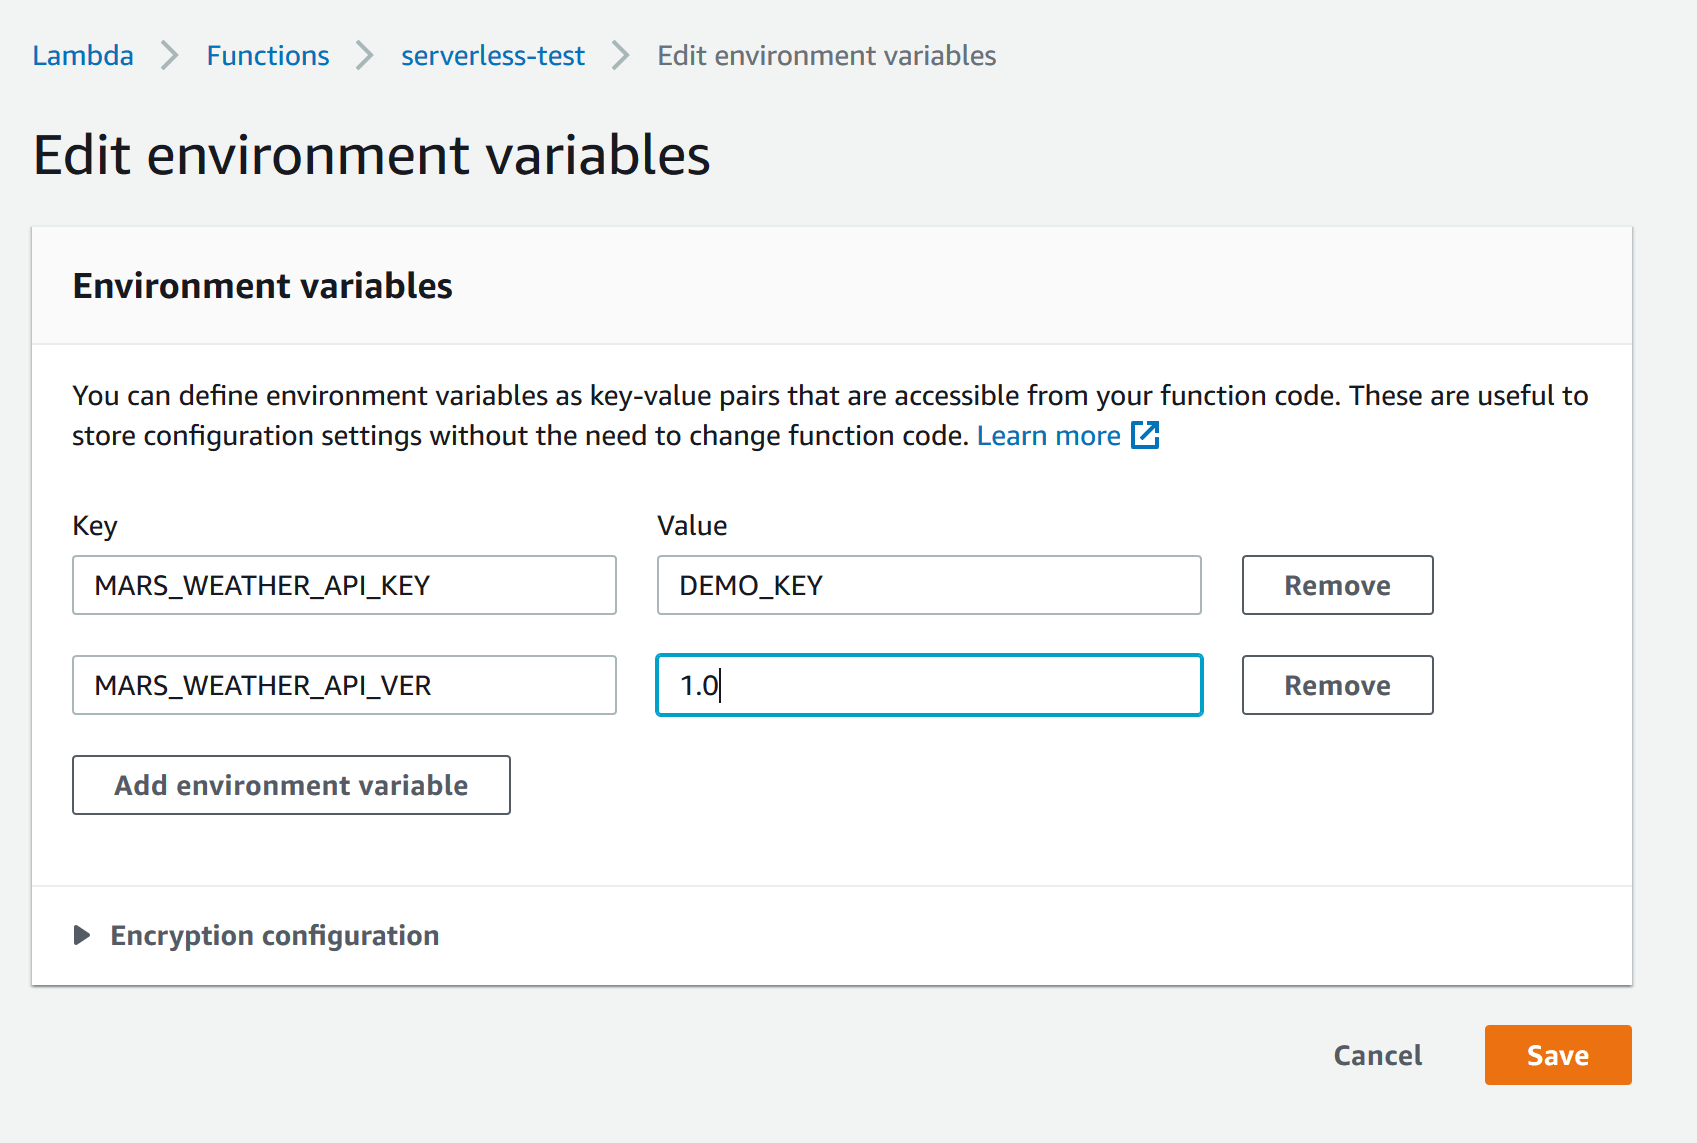
Edit Lambdas Env Vars
-
The lambda is ready
Set up API Gateway Step By Step
- Go to service and select AWS API Gateway
- Click on Create API
- On the selection screen Scroll to REST API and click Build
- On the following screen select REST as the protocol select New API in the Create New API section, give it a name and a description, and for this tutorial let’s select Regional for the endpoint type, for production you might want to select Edge make sure you learn about the difference between the two for your production project. The TLDR is, Edge is better for International sites or nation wide sites (for USA), if your API is for a specific region (restaurant in a city, or local business) regional should do the job.
- Click Create API
- On the next page, you will have one resource created for you / (home), the way API Gateway works, now you need to add methods to the resource, let’s do that by selecting home / resource and clicking the Actions button on top, and select add method.
- It will prompt you to choose the verb you want to create for the endpoint, we will do GET
- For Integration type select Lambda function
- Check Use Lambda Proxy Integration
- Select the Region where you created your Lambda
- Select the name of your lambda in the Select Lambda input textbox
- Leave the default time out and click Save
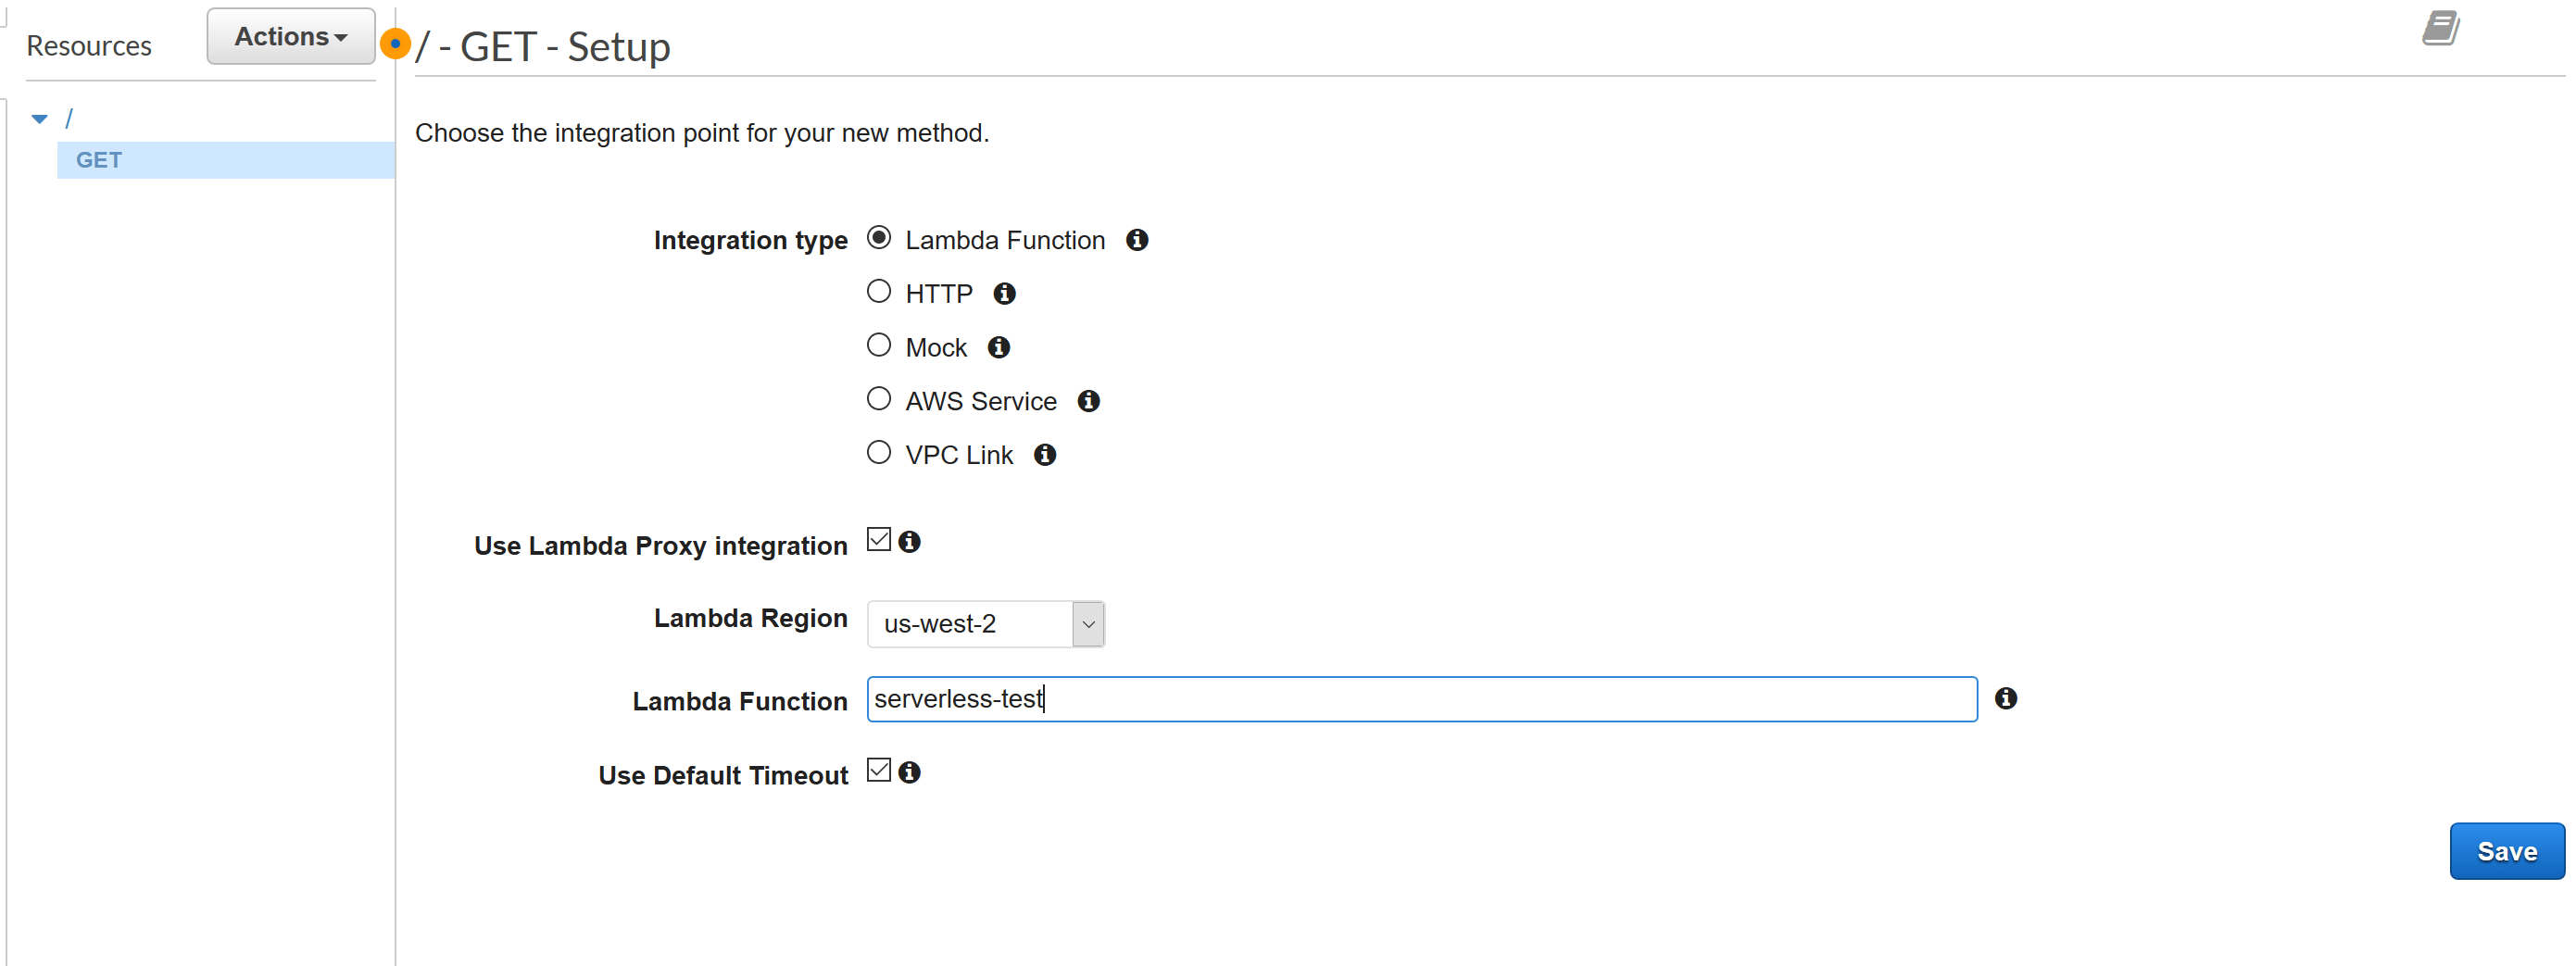
create methond and integrate with lambda
- It will ask you if you are okay granting permission, Accept.
- The way API Gateway currently works for the mars/weather/sols GET endpoint we will need to add a mars resource with a nested weather resource with a nested sols resource and a GET method for sols after creating this we proceed the same way as in step #6
Using the routes we created for gin create the corresponding resources and methods in API Gateway, when you are done adding all the routes to API Gateway your console should look like this:

mars weather sols test
You can test the api endpoints using API Gateway method testing feature, however, in order to access the API from a browser, client or a testing platform like POSTman you will need to deploy the API. Let’s deploy it.
Deploying AWS API Gateway to a stage
- Click on the Actions dropdown button and select Deploy API
- In the module select New Stage and for our purpose let’s name it dev feel free to add the descriptions, but they are not necessary.
- AWS API Gateway should generate an URL for you, and you can user that URL as your API base URL
- The endpoint for mars should be {{amazon_generated_url}}/dev/mars/weather/sols
- This complete the tutorial from A to Z
We will add the unit testing in another post 😉😉😜…
Conclusion
We created a go API powered by gin gonic, it can be developed and tested locally because we gave it two entry points, one for local development and one for AWS lambda deployment. We also added integration to a third-party API, namely NASA mars rover API to demonstrate a real-world integration test with env vars and external API.
It should be obvious by now the flexibility that AWS API Gateway and AWS Lambda provides for a serverless infrastructure. You can attach AWS API Gateway endpoints to different AWS Lambda functions, some could be written in go, some in python and others in Node JS. API Gateway also allows you to integrate directly to other AWS services like S3 and such, the possibilities are many, this is a starter, have fun!